Difference between revisions of "Mounting Network Drives"
From MorphOS Library
| Line 64: | Line 64: | ||
If you want to unmount the shares with the Eject [[Screenbar_Modules|screenbar module]], you'll have to decide to use a certain pattern with device names you mount and add the pattern to the Eject module's settings. If you keep using device names like NetFS0, NetFS1, NetFS3, etc, you could add '''NetFS#[0-9]''' or '''NetFS#?''' or similar to the Unmount pattern. | If you want to unmount the shares with the Eject [[Screenbar_Modules|screenbar module]], you'll have to decide to use a certain pattern with device names you mount and add the pattern to the Eject module's settings. If you keep using device names like NetFS0, NetFS1, NetFS3, etc, you could add '''NetFS#[0-9]''' or '''NetFS#?''' or similar to the Unmount pattern. | ||
: [[File:NetworkDrives_NetFS7.png|480px]] [[File:NetworkDrives_NetFS8.png|480px]] | : [[File:NetworkDrives_NetFS7.png|480px]] [[File:NetworkDrives_NetFS8.png|480px]] | ||
| + | |||
| + | |||
| + | Also if you like to have a new default icon for the previous devices, copy or create an icon named def_NetFSxdisk.info to the SYS:Prefs/Presets/Deficons/ directory. '''Copy SYS:Prefs/Presets/Deficons/def_SMBFSxdisk.info SYS:Prefs/Presets/Deficons/def_NetFSxdisk.info''' would use the same icon with SmbFS and NetFS shares. | ||
Revision as of 06:51, 7 February 2016
SmbFS
Windows shares, and Samba shares on other systems like Linux servers and NAS devices, can be mounted with the native SmbFS shell command which is included with MorphOS. You shouldn't install any third party versions, because the included command is the most up-to-date and compatible version available, and it also has 64-bit I/O support.
The SYS:MorphOS/Locale/Help/english/SmbFS.txt file contains a detailed description of all SmbFS options, but in most cases you'll be fine with just few basic options.
A simple example ran from the shell:
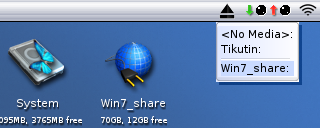
SmbFS WORKGROUP=workgroup USER=myusername PASSWORD=mypassword  VOLUME=Win7_share: SERVICE=//win7/sharedstuff
Connected '//win7/sharedstuff' to 'Win7_share:'; "Break 5" or [Ctrl-C] to stop...
The VOLUME option specifies a volume name for the mounted device. Without it the device would only be accessible with its device name and no icon would appear on the Ambient desktop. Any name you want will be fine.
The first part of the SERVICE option contains a remote file server's name as seen, for example, on the network computers list on Windows. It is followed by a share name, which would be seen if you'd open a network computer on Windows. The server name is win7 and the share name is sharedstuff in this case.
The share can be unmounted by pressing CTRL C keyboard combination when started like this.
The server name should work as it is, but if the host can't be found for some reason, you could try to add it to the Hosts settings in the MorphOS preferences.
If you want to start the SmbFS command as a background process from the shell, the S:user-network-startup file, or anywhere else, you can launch it with the Run command. The >NIL: redirect ensures that no output windows will pop up either.
Run >NIL: SmbFS WORKGROUP=workgroup USER=myusername PASSWORD=mypassword VOLUME=Win7_share: SERVICE=//win7/sharedstuff
There are several ways to unmount the share now, but the easiest is to use the Eject screenbar module or the UnMount command.
If you replace the PASSWORD option with the ASKPASSWORD option, you'll get a requester asking for the password.
Run >NIL: SmbFS WORKGROUP=workgroup USER=MorphOS_Rulez ASKPASSWORD VOLUME=Win7_share: SERVICE=//win7/sharedstuff
NetFS Revised
NetFS Revised allows to mount drives between MorphOS and AmigaOS systems. It is the best alternative to share files between Amiga compatible systems, because it preserves protection bits and other Amiga-like file properties.
Here's a step-by-step guide how to install it on MorphOS.
- Copy NetFS/C/NetMount.morphos to SYS:C/NetMount (remove the .morphos extension)
- Copy NetFS/C/InetD/netfs-server.morphos to SYS:C/InetD/netfs-server (make the InetD dir and remove the .morphos extension)
- Copy NetFS/L/netfs-handler.morphos to SYS:L/netfs-handler (remove the .morphos extension)
- Copy NetFS/Prefs/Env-Archive/netfs-server.config to ENVARC:
- (Optionally) Copy NetFS/Devs/DOSDrivers/ANETFS0 to SYS:Storage/DOSDrivers/ (if you want to mount a drive with a mountlist later)
- (Optionally) Copy NetFS/Help/english/NetFS.guide to HELP:english/ (to keep the documentation available)
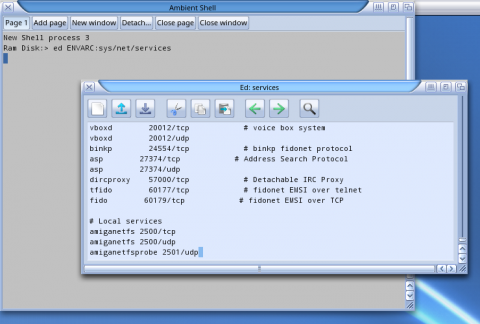
- Add an amiganetfs 2500/tcp line to the ENVARC:sys/net/services file.
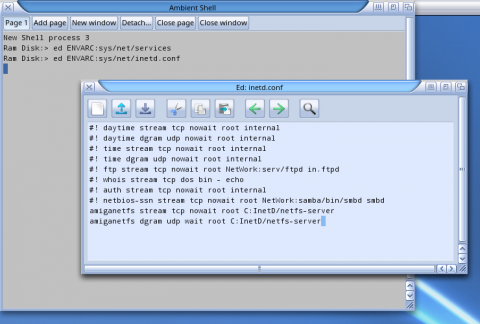
- Add an amiganetfs stream tcp nowait root C:InetD/netfs-server line to the ENVARC:sys/net/inetd.conf file. If you don't plan to use the system as a server, you may leave it commented by starting the line with the # character, but better add the line there for the future use.
- Edit the last line on the ENVARC:netfs-server.config file to your liking on the server machine. In this example we'll allow access to the Work: partition with certain login and password.
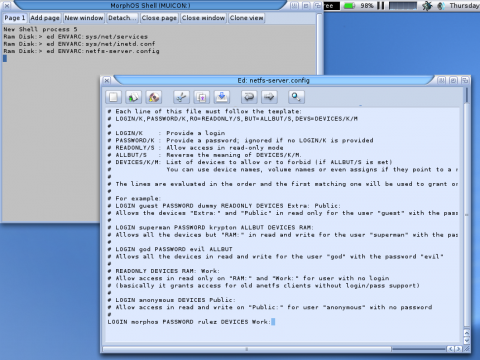
- Reboot the machine before trying it out.
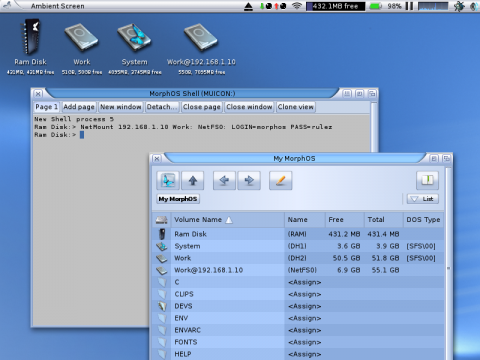
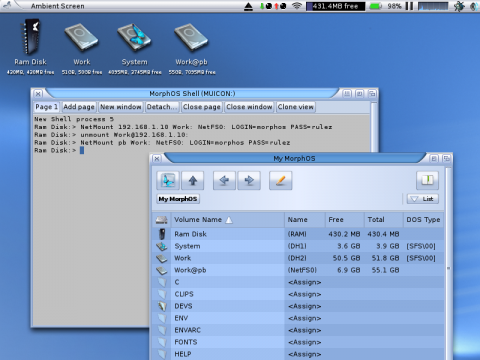
The server works automatically, and you just need to connect to it from a client machine. We can mount server's Work: partition by running the NetMount command on the client machine. Server's IP address is 192.168.1.10 in this example.
NetMount 192.168.1.10 Work: NetFS0: LOGIN=morphos PASS=rulez mounts the remote Work: partition as a local device called NetFS0:. The local device name can be anything you want, but NetMount creates the volume name automatically by adding the address after the remote volume name.
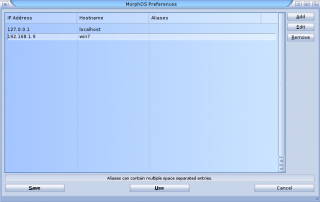
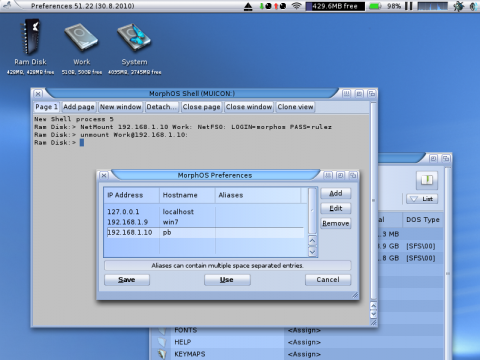
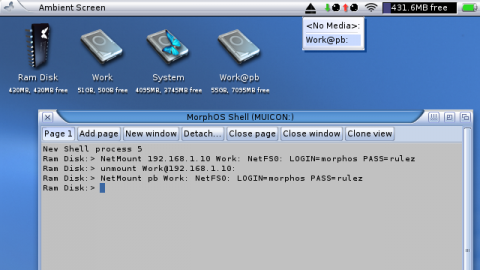
A prettier solution is to add a hostname for the server IP address, if you haven't done that already, and use that instead of the numerical address. Let's remove the mount with the UnMount command and add a hostname on the Hosts settings in the MorphOS preferences.
And let's try again with the NetMount pb Work: NetFS0: LOGIN=morphos PASS=rulez command.
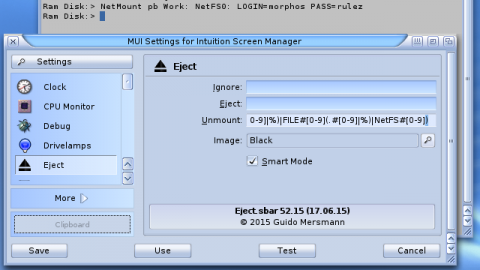
If you want to unmount the shares with the Eject screenbar module, you'll have to decide to use a certain pattern with device names you mount and add the pattern to the Eject module's settings. If you keep using device names like NetFS0, NetFS1, NetFS3, etc, you could add NetFS#[0-9] or NetFS#? or similar to the Unmount pattern.
Also if you like to have a new default icon for the previous devices, copy or create an icon named def_NetFSxdisk.info to the SYS:Prefs/Presets/Deficons/ directory. Copy SYS:Prefs/Presets/Deficons/def_SMBFSxdisk.info SYS:Prefs/Presets/Deficons/def_NetFSxdisk.info would use the same icon with SmbFS and NetFS shares.
RDesktop
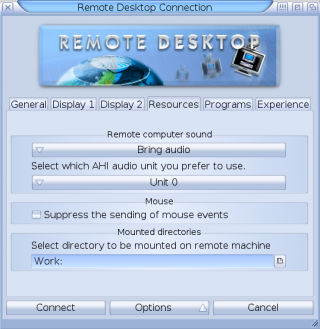
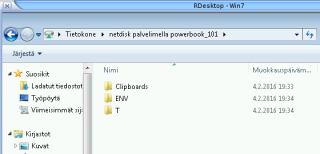
The RDesktop application included in MorphOS displays a remote machine's desktop on your computer, but it can also mount a local directory on the remote machine. If you're using RDesktop to control a remote machine, it's a good way to share MorphOS files to the remote machine without needing to install any other services on your MorphOS computer.
Click the Options button on the RDesktopGUI window, open the Resources tab, and select a directory on the Mounted Directories group. The directory will be shown on the remote machine when you connect to it.
Google Drive Handler
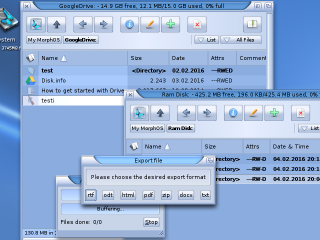
The Google Drive handler mounts a Google Drive storage on MorphOS. The handler works as a read only device without a licence key.
The full version has write support and it can export Google documents to RTF, ODT, HTML, PDF, ZIP, DOCX, and TXT formats. It simply asks the desired format when copying a Google document file from a mounted volume to any other location.
NFS
There aren't any native clients or servers for Sun's NFS protocol on MorphOS, but you can still use old 68k binaries for it.
Read more about it here.
FTPMount
FTP sites can be mounted as part of a filesystem with the FTPMount program.
An installation tutorial is found here.
Samba
There are few ports of the full Samba package, but they are quite old and usually just overkill in most cases. If SmbFS or RDesktop fills your needs, don't go for full Samba.
Other
You might find other options and protocols to mount network drives, especially from 68k binaries. For example Envoy should work on MorphOS to some degree, but be prepared to google around and face some issues when setting it up.
