How to Install Directory Opus Magellan II
From MorphOS Library
Contents
Preface
This is a tutorial how to install the original Amiga version of Directory Opus 5.82 Magellan II filemanager on a MorphOS machine. There are newer open source versions of the program available nowadays too, but at least MorphOS ports are a bit unstable at the moment and you might prefer to use the original version.
Installation
Installing from the Pre-installed Archive
The easy method is to install from the pre-installed archive found here.
- Download the archive and extract it to the location you want.
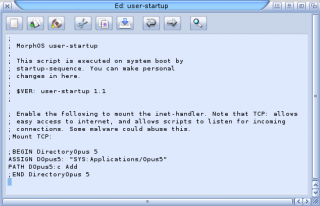
- Edit the S:user-startup file with correct Assign and Path lines. It is important that DOpus5: assign points to the correct directory where you extracted the archive. Here's how it looks after the original installer:
- Reboot (or set both assign and path manually on the shell).

You can start the program now and jump to Registration section of this tutorial.
Installing from Floppy Images
Nothing prevents from installing the program from scratch either. It just has more steps and requires original floppy images in ADF format.
- Download ADF images or convert DMS images to ADF with xDMS, for example.
- Download two patch archives from SourceForge or Aminet. These will be used to update from the initial Magellan II release (5.80) to the latest 5.82 version.
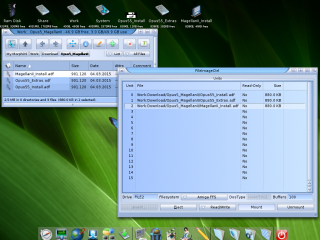
- Start the Tools/FileImageCtrl program and insert "Opus55_Install" and "Opus55_Extras" ADF files into it (you can drag&drop the files or use the Insert button).
- Mount the images by selecting "Amiga FFS" filesystem and clicking the Mount button for each file. FileImageCtrl window can be closed after successful mounting.
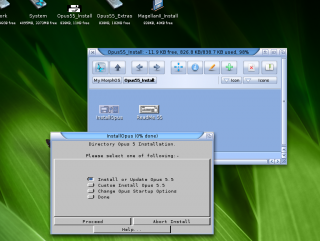
- Open the Opus55_Install disk from the desktop and double click the InstallOpus icon. Only the important options are covered in the following steps, otherwise just follow the instructions and make your preferred selections.
- Select "Install or Update Opus 5.5".
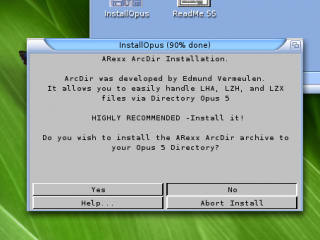
- Do not install ArcDir, because it's broken under MorphOS! We will replace it with XADopus instead.
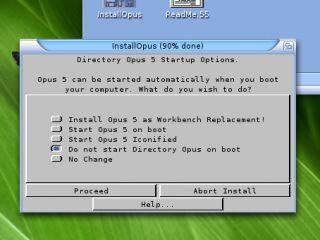
- Select "Do not start Directory Opus on boot" in startup options selection.
- Reboot the machine after the installation is done.
- Start the Tools/FileImageCtrl program again, insert the MagellanII_Install ADF image, and mount it.
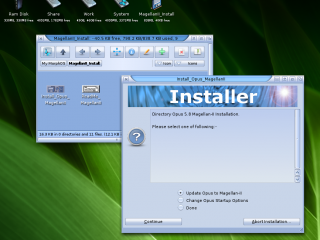
- Open the disk on the desktop, double click the Install_Opus_MagellanII icon, and select "Update Opus to Magellan-II". Installation should be straightforward to finish.
- After successful Magellan II update, extract the two patch archive files (5.81 and 5.82 updates) to a temporary directory, like "Ram Disk:" for example.
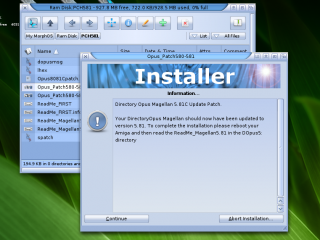
- Navigate to "PCH581" drawer, double click the Opus_Patch580-581 file, and do the installation.
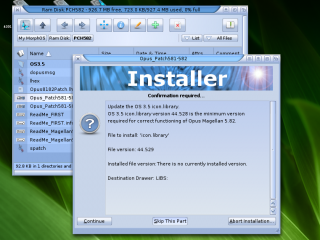
- Navigate to "PCH582" drawer, double click the Opus_Patch581-582 file, and start the installation.
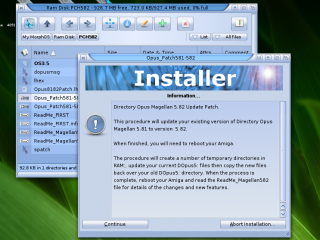
- When it asks to update the OS 3.5 icon.library, select "Skip This Part".


The base installation is now done and you can start the program from the location you originally chose.
Registration
You can use a free serial number (4456BLJEM4616474390) to finalize the installation and to prevent the registration window popping up on program startup. Registration window may cause debug hits on MorphOS if it doesn't accept the data you entered. If that happens, reboot the machine before continuing.

Workarounds for Graphical Issues on MorphOS
When the program is run with default settings, it opens on its own screen and some quite visible graphical issues are seen. A custom screen title and two window gadgets don't seem to fit with the rest, and Ambient's PNG icons don't work.

The custom screen title can be removed with the DOpus/WorkbenchTitle env variable. Type in the shell:
Setenv SAVE DOpus/WorkbenchTitle 1
One of the problematic gadgets can be removed with the following command:
Setenv SAVE DOpus/HidePadLock 1

The other gadget (iconify) can be removed only by patching the original DirectoryOpus executable. A suitable patch for it can be found inside the D2A program's archive. Extract the D2A archive and run D2A/Patch/Script file. It will make a backup of the original executable and replace it with a new patched one.

Your Directory Opus screen should look like this now:

Integrating with Ambient
PNG icons can't be shown on the Directory Opus screen, but Directory Opus and its functionality can be integrated quite seamlessly to the Ambient screen. It's convenient to select which way you want to manage the files when both Ambient and Directory Opus are on the same screen. You can open Ambient windows when wanting to view by PNG icons and unleash the power of Directory Opus in many other cases.
The integration can be taken a step further by hiding the Directory Opus's main window and enabling the pop up of its listers when clicking on the Ambient screen. This can be achieved with D2A or Magellambient programs.
D2A will be used in this tutorial and it requires a working ARexx environment. If you haven't enabled ARexx in your system yet, install rexxsyslib.library with Grunch or manually.
- Download and extract D2A to some temporary directory if you haven't done it already.
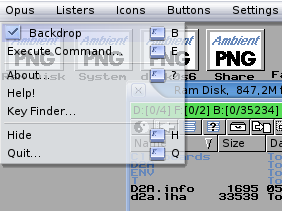
- Disable (uncheck) the Backdrop mode from the pulldown menu on Directory Opus.
Main window will show up in full screen size: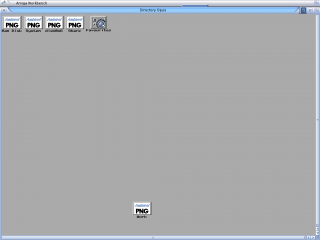
- Resize the main window as small as possible.

- Select "Settings/Save Layout" from the pulldown menu to snapshot window positions.
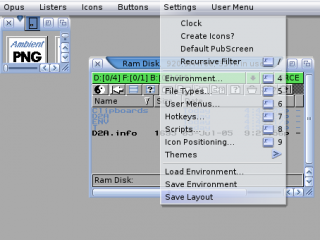
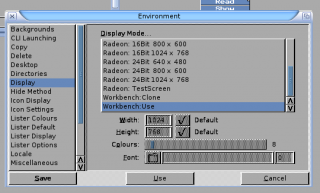
- Open Environment settings from the "Settings/Environment..." pulldown menu and select "Workbench: Use" to a display mode. Click "Save" button.
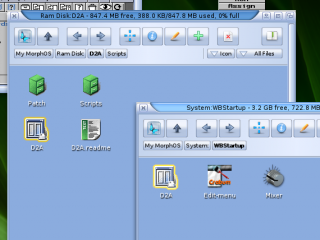
Directory Opus uses the Ambient screen now:
- Open the D2A drawer and copy the D2A program to your WBStartup drawer (to be started on boot).
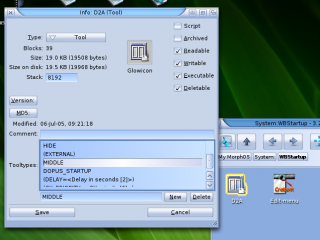
- (Optional step) By defalut D2A will open a DOpus lister when doing the double click on the desktop, but it may clash with the similar function in Ambient if you have enabled it. D2A can be configured to open the DOpus lister with a single middle (wheel) click instead. Open the icon information window of the D2A in your WBStartup drawer (right click on it and select "Information..." or left click to select the icon and lcommand-i from the keyboard). Double click the "MIDDLE" tooltype so that parentheses around it are removed. Click "Save" button.


If you now have Directory Opus quitted and double click the D2A icon on the WBStartup drawer (or reboot the computer), Directory Opus will load and it shows the little main window for a few seconds until it gets hidden. The rest of DOpus windows will stay visible on the Ambient screen and you can open new DOpus listers by middle click on empty space on the Ambient desktop (or double left click if you skipped the last step).

The main window can be moved somewhere else on the screen to be less noticeable at the boot. For example to the lower right corner where it doesn't pop up over the drive icons. You can unhide the hidden window with ctrl-alt-u or ctrl-alt-a keyboard combinations, if you want to move it after hiding. I also like to close all DOpus windows to let it be more under the hood on the startup. Use "Save Layout" again to snapshot the window setup and positions.

Directory Opus running under the hood after a reboot, available with a one click:
