Recording an LP with Audio Evolution 4
From MorphOS Library
Author: Kelly Samel (realstar@shaw.ca)
Contents
Tutorial for Audio Evolution 4 - Recording a vinyl LP into your computer
If your like me you have a nice collection of vinyl LPs that you like to listen to but sometimes the portability of having mp3 files is also a good thing. The answer is to digitize your vinyl collection and put the songs on your computer. So here is an explanation of my method for doing so using Audio Evolution 4.0.23.
Things You Will Need
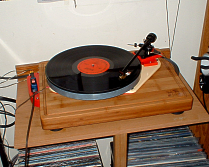
- A turntable
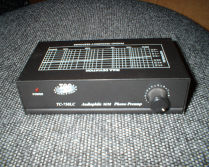
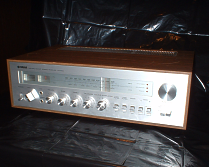
- A stand alone phono preamp or amplifier/receiver with phono inputs
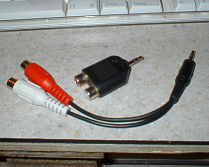
- A stereo RCA to 3.5mm mini jack adaptor
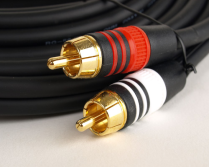
- An RCA extension audio cable long enough to reach your computer
- MorphOS and a copy of AudioEvolution 4
Getting Started
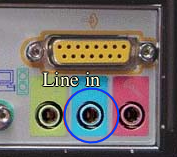
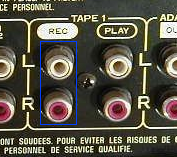
First thing is to make sure your turntable is connected to your phono stage/amplifier correctly. Also ensure it is setup correctly with a good stylus and some clean records to play. If you are using a receiver or integrated amp then you need an RCA audio extension cable plugged into the TAPE REC OUT jacks on the back of the unit. (this may vary by model) If you have a stand alone phono preamp then plug your audio cord directly into the output jacks on that. In either case your audio output cable should then be connected to the 3.5mm mini jack adaptor. Next you need to find the line in jack on the back of your computer. This is usually colored blue. Plug the 3.5mm mini plug into this port. OK. Everything is now connected to start recording audio into your computer.
Launching the Software
Select an audio mode
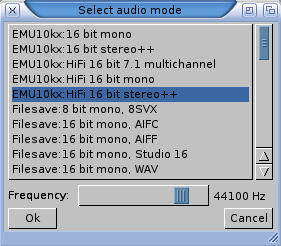
Start Audio Evolution 4 software and select an approprate screenmode. When it asks what audio mode you want to use select the appropriate option for your machine. If you have an external soundblaster card for instance then "EMU10kx HiFi 16 bit stereo++" would be correct. A Pegasos computer using internal audio would use "Pegasos: HiFi 16 bit stereo++". I would suggest 44100 as the sampling rate as this matches CD audio quality and will translate well to the MP3 format.
Start a new project
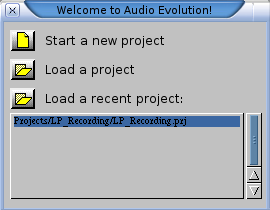
Now select Start a new project and give your project a name in the filerequestor. Keep in mind that your project location is where all recorded audio samples will reside so make sure you have at least a couple GB of free space.
Set audio card input source
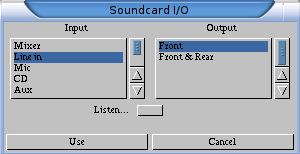
Under (menu item: Options->Soundcard in/out) make sure input is set to line in. Now is also a good time to save your preferences. (menu item: File->Save preferences)
Preparing to Record
Find the control window
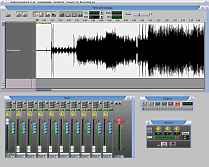
Next step is to find the Control window. This is often hidden beneath the Time Line Display window when you first start the application so use the depth gadgets to reveal it.
Testing the input
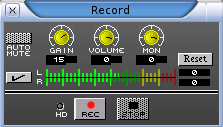
Now press the red record icon to open the recording panel. Click the check box next to the Left and Right input levels to begin monitoring the input. Now put an LP on your turntable and start playing the record. You should be able to see the colored level meters moving back and forth. This indicates the strength of the audio signals your computer is receiving. If the meters are moving then the audio from your turntable is coming in fine and you are nearly ready to record.
Setting correct gain
If the L/R levels appear too low you may have to increase the gain setting. I found a gain setting around 15 to be good for most of my recordings. The correct value will vary a little depending on your equipment and the record you are playing. You want to keep the level meters in the upper green area with only the very loudest parts of the recording just peaking into the red area. This will give you a good balance of volume and preserve the dynamic range of the recording. Do not record with the signal constantly going into the red as you will be effectively clipping off and losing a lot of audio information that you want to preserve.
Recording the Audio
Time to record
If everything checks out up to this point then get your tonearm cued up at the beginning of the A side of the record and press the red 'rec' gadget. Now you will notice your hard drive LED flashing as well as the virtual HD LED in the recording window. This means that audio is being saved onto to your hard drive. You can now lower the tonearm down at the lead in groove and start sending audio data to the software. Once you reach the end of the LP side you can press the stop gadget to stop recording and save your sample. When the requestor asks if you want to keep the sample select 'okay' and give it an appropriate filename.
Editing the audio waveform
Getting ready to edit
At this point we will begin to break up the large audio stream into the individual music tracks that make up the album side. You need to close the recording panel to continue. The rest of the work will mostly be done in the Time Line Display.
Viewing and playing back the audio waveform
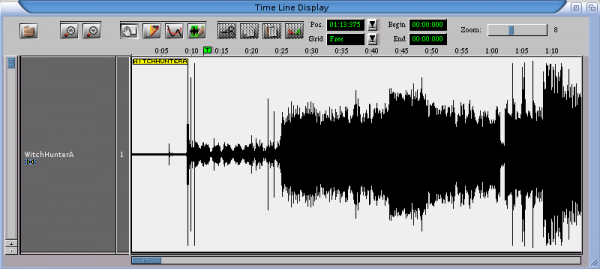
After recording you will see a visual representation of the audio you just recorded in the timeline display.
First its a good idea to expand the track display until you can see the track
we are working on better.
Also adjust the zoom level so that you can see the silent gaps between the
songs better. Generally a zoom level of 8 or so is ideal.
The scroll bar at the bottom of the window is used to scroll left/right
through the audio data currently displayed.
You can listen to any part of the waveform by clicking on the play icon
within the control window or by pressing the space bar. Pressing the
stop icon or space bar again will halt playback.
Set your starting playback position by clicking the timing ruler
just above the waveform display. You can also click and drag the green
time marker for fine adjustment of your current playing position.
Trimming lead in and lead out
First thing we need to do is trim off the empty lead in area at the beginning of our LP side. So we need to find out where the first song starts by looking at the waveform visually and by listening. We then want to seperate this lead-in area from the actual start of the first song. We will use the split tool to achieve this
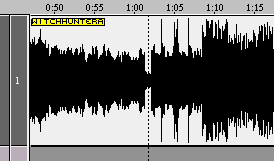
Put the editor into split mode by clicking on the split icon. Now as you hover the mouse pointer over the waveform display you will see a dotted line that demonstrates where a split can be made.
Line up the dotted line just before the start of the first song and click once. Change the edit mode back to grab/move before continuing just so you don't accidentally make more splits by clicking on the waveform again.
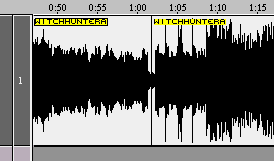
Now you may notice that we have two pieces of audio data sitting next to each
other at the split point. Each section of audio data is labeled. One section to the
left and one section to the right of where the split point was made. You can
select the section containing the empty lead in by clicking on it once. Pressing the delete key on your
keyboard or right clicking and selecting "Remove" from the popup menu will delete the section.
Presto it's gone and we are left with only the part we wanted to keep. You can now scroll to the
end of the audio data and using a similar process remove the empty lead out section at the end of the LP.
Breaking up the audio tracks
At this point we have the complete audio from our first LP side with the lead in and lead out trimmed off. Next we want to split this one big waveform into individual song tracks. This is easily achieved by finding the silent gaps between each song both visually and by listening and then making a split just before the start of each song. You should end up with several split sections beside each other, one for each song.
Saving the audio tracks
Now that all of the songs have been split up into individual audio sections we can go ahead and start to save them out to disk as AIFF samples. Select the song you want to save out by clicking directly on the section containing it and then right click and select "Save To Disk" from the popup menu. Do this for each song and give the tracks meaningful file names. Congratulations you have now recorded, trimmed and saved out all of the songs from one side of an LP. Now you can repeat this prodedure for Side B.
Converting to MP3 files
So next thing you are asking is how am I going to make these into MP3 files. I suggest the freeware program CodeAudio (formerly named:TheMpegEncGUI) in conjunction with the lame mp3 encoder. You can specify a list of input files where you can select the AIFF files that you previously saved to disk and then you can batch encode the lot of them in one fell swoop. I suggest using joint stereo 256Kbps and high quality (-h) mode for good quality MP3 playback.
Links
Audio Evolution 4 http://www.audio-evolution.com
Onyx Soft Code Audio http://www.onyxsoft.se/codeaudio.html
Lame MP3 encoder http://aminet.net/mus/misc/lame-morphos.lha
